Showing posts with label cooking. Show all posts

Tuesday, August 27, 2013

Tasty Tuesday: Homemade Gyoza / Potstickers

I'll be honest I don't know the difference between the two.  I love them both.  Menus where I live seem to list both names almost synonymous with what shows up on my plate.  So call it whatever you want and I'll call them delicious.  This recipe comes from my sister who lived in Japan for a time teaching English and conversational English.

Homemade Gyoza / Potstickers
1Cabbage (Naptha supposedly works best; I used standard my first time making it)
1/2 lbGround pork or turkey (I used 1 lb ground turkey)
3 tspSesame oil
3 tspSoy sauce
1 1/2 tspGround ginger
1 1/2 tspGround garlic
1 1/2 tspSalt
2                packages of wonton wrappers
Cut up cabbage into very small pieces. Put in bowl and add salt. The salt helps to purge some of the water out of the cabbage.  Squeeze cabbage to remove excess water before mixing with meat.  I also placed it on paper towels to press some of the water out. 

Mix remaining ingredients with cabbage.  You'll want to use your hands for this to be effective. 

Put a small amount of the mixture in the middle of wonton wrapper and fold.  The square type wontons fold over into a triangle and then connect the two corners.  Use warm water to seal the wontons and avoid getting the mixture on the edges. The back of  most packaging has helpful instructions and pictures.

Freeze if desired.  Flash freeze first (on a cookie sheet or flat surface) until frozen and not sticky.  After flash freezing you can place them into ziploc bags.
COOKING: Add 1 to 2 T oil to pan and heat over med-high. Fry bottoms of gyoza until golden brown. Add water to pan until bottom is covered but not too deep (1/4 c or less). Cover with lid and cook for 7-8 min or until bubbling sound changes to a sizzle. Serve with rice.

DIP: soy sauce and couple drops of chili oil (or even tabasco) and small amount of vinegar to taste.

* I made approx 1 gallon size freezer bag of gyoza / pot stickers with this recipe.  It works great for freezing...just add a couple more minutes of cook time.  When I cook mine I'll try to remember to add a couple more photos.

Tuesday, July 16, 2013

Tasty Tuesday: Ham Fried Rice

My mom has been making the best ham fried rice since I can remember.  It's super yummy.  Probably not really good for you but the taste says "eat me anyway".  I do of course.  Plus it's a recipe that leaves leftovers for work lunches or leftover night (we've been doing more of this to save on our budget).

Ham Fried Rice

1 stick of butter
6 eggs - scrambled in a bowl
3/4 C of frozen peas and carrots
8 oz cubed ham
4 cups cooked rice
Soy sauce
salt and pepper
1/2 can bean sprouts (optional - my girls won't eat them so we forego usually)


In a large skillet heat up stick of butter until it's melted and sizzles a little.  Pour in your beaten eggs and scramble them.  Next add ham and allow it time to heat up (pre-cubed is already cooked).  Then add frozen peas and carrots (I use about 1/2 the package) and give this time to thaw and heat.  Once everything in the skillet is cooked combine it with your cooked rice in a large bowl (this helps to avoid spilling).  Serve while still hot or warm.  It does reheat really well for leftovers as well.

Wednesday, July 4, 2012

Whip It Up Wednesday: Minestrone Fix-Up

I am being lazy.  I even made something new for my Whip It Up Wednesday.  It was even a hit with everyone (my father-in-law had three servings!).  But it can wait.  Today was rainy and cool.  What a relief after all the heat.  So I made minestrone soup.  The lazy way too...go figure.  I like Bear Creek soups for quick meals on cold (or cool) days.  But the sodium in them kills me (literally and figuratively I'm sure).  My solution:


Double the water!  You can't tell the difference...I think it tastes better.  I cook mine with sausage usually (yeah I know...adding sodium right back in).  But I double or nearly double the water from 8 cups to 14 cups or more.  I also like to add extra noodles and a can of diced tomatoes or corn or beans or whatever extra good thing I have in the freezer or on the shelf.  Bonus:  it stretches even further in addition to hopefully lowering the sodium per serving.  Just passing on.  I'm sure there are healthier soups out there but like I said...this is my lazy day meal. 

Wednesday, June 20, 2012

Whip It Up Wednesday: Tusan Pasta With Tomato-Basil Sauce

Like many of my friends I am newly (or not so newly anymore) addicted to Pinterest.  I love to pin recipes that I want to try, home decor that I swear I will use once we're on our own again and crafts that interest me.  But I figure lots of people never even try their pins out...what a waste of time to pin and not use.  My in-laws have recently fallen victim and grateful recipients of my interest to weed out good recipes from the hum-drum stuff.

Tuscan Pasta with Tomato-Basil Cream Sauce (original found here)


1 (20-oz.) package refrigerated four-cheese ravioli* (I used spaghetti or fettucine noodles also)
1 (16-oz.) jar sun-dried tomato Alfredo sauce
2 tablespoons white wine (optional; I put milk in instead)
2 medium-size fresh tomatoes
1/2 cup chopped fresh basil
1/3 cup grated Parmesan cheese
Garnish: fresh basil strips

Preparation:
1. Prepare pasta according to package directions.
2. Meanwhile, pour Alfredo sauce into a medium saucepan. Pour wine into sauce jar; cover tightly, and shake well. Stir wine mixture into saucepan. Stir in chopped tomatoes and 1/2 cup chopped basil, and cook over medium-low heat 5 minutes or until thoroughly heated. Toss with pasta, and top evenly with 1/3 cup grated Parmesan cheese. Garnish, if desired.
*1 (13-oz.) package three-cheese tortellini may be substituted.
**1 (14.5-oz.) can petite diced tomatoes, fully drained, may be substituted.
Note: For testing purposes only, we used Buitoni Four Cheese Ravioli and Classico Sun-dried Tomato Alfredo Pasta Sauce.

My Star Rating: 4.5
** I LOVED this the first time but it was simply just delicious the second...still would make it repeatedly though; my in-laws and husband also raved about it.  Major plus...it is so easy to prepare.

Wednesday, March 14, 2012

Whip It Up Wednesday -- Banana Zucchini Bread

I love banana bread and I love zucchini bread.  I had purchased bananas for my girls and then some zucchini to make bread.  Seeing as how the bananas were becoming overripe and I still hadn't made my zucchini bread I decided to combine the two.  So here is my first minor experiment in recipe adjusting.

Banana Zucchini Bread

1/2 C shortening
1 C sugar
2 eggs
2 ripe bananas
1 small to medium zucchini grated
1 C all purpose white flour
1 C wheat flour
1 tsp baking soda
1/2 tsp cinnamon
1/2 tsp vanilla extract
1/2 tsp salt
1/2 C nuts (optional)

Cream shortening, sugar, eggs, bananas, grated zucchini and vanilla together.  Sift in flour, soda, cinnamon and salt.  Blend all of your ingredients together, mixing in nuts at the end if you desire.  Pour batter evenly into  two greased/floured loaf pans.  Bake for 45 minutes at 350* F.  If making muffins cook at 350* for 35 minutes. 

Notes:  You can do this recipe with three bananas instead of the zucchini.  My original recipe called for 2 cups white flour but I have become of fan of putting in at least half wheat flour.  I also decided to add some cinnamon.  My loafs both stuck to the pan using spray so I would recommend the grease and flour method for this one.

Rating:  5 stars 
-I really enjoyed this one.  It was easy to throw together and cook despite the disaster in my kitchen (more on that later).  I like the mixture of flavors.  Also my girls definitely enjoyed this bread and were begging for more (you know the open mouth and "ah ah ah" type begging). 

Wednesday, February 29, 2012

Whip It Up Wednesday -- Zucchini Muffins

I've said it before and I'll say it again (especially on another lazy Wednesday like today).  I am finding all sorts of healthy toddler recipes online.  I love giving them something healthy and heck it is dang tasty to me as well.  This one comes from homemade-baby-food-recipes.com.  Find it and other finger foods here.


Cheesy Zucchini Muffins
2 eggs
3/4 cup milk - use whole milk, formula or breast milk
2/3 cup olive oil
1 cup all purpose flour
1 cup whole wheat flour
2 tsp baking powder
1 medium zucchini, grated
1 to 2 tsp dried oregano (adjust according to your baby's taste)
3 tbsp grated Cheddar cheese

Preheat the oven to 450 deg F.  Beat the eggs and milk together in a bowl, then stir in the oil.
In a separate bowl, combine the flour and baking powder.  Mix the wet ingredients with the dry ingredients until the flour is moistened (the batter should look lumpy - don't try to make it smooth).
Carefully stir in the zucchini and oregano.  Spoon into greased muffin tins (you should get 12 muffins) and top with the cheese.
Bake for around 20 to 25 mins, then cool and serve!


Notes:  I didn't change this one much.  I used canola oil instead of olive oil.  Also since I didn't have oregano on hand I put in some Italian seasoning.  This is a very easy recipe and also freezes and reheats well (although keep in mind hot spots if you microwave to reheat).


Rating: 5 stars
-love these.  A sweet but savory taste.  I love to cut them open and spread butter on them. 

Wednesday, February 22, 2012

Whip It Up Wednesday -- Pumpkin Pancakes

Man I'm a slacker.  I was going to put in effort and share a recipe out of my books or recipe box but sorry not going to happen this week.  But I have been on a "I need healthier foods and snacks for my girls" kick so I will share a recipe that I really like and they seem to love.

Pumpkin Pancakes (via WholesomeToddlerFood.com ...I love love love them for kid recipes...check them out)

1 C whole wheat flour
3/4 C white flour
1 T baking powder
1/2 tsp salt
2 tsp cinnamon
1/2 tsp ground ginger
1/4 tsp allspice
1/4 tsp nutmeg
2 eggs
1 C pureed pumpkin or canned pumpkin
1 tsp vanilla
2 C milk
3 T canola oil

Stir/sift together all of the dry ingredients in a medium bowl.  In a separate larger bowl beat eggs, pumpkin and vanilla together.  Add milk and oil and beat again until smooth.  Add the flour mixture.  Cook as usual.

Notes:  I left out the salt (as did the author) and the allspice (I didn't have any).  I would actually try adding the salt next time but they taste fine without it.
I must be a pancake cooking ninny.  The first couple didn't flip well for me.  Make sure you cook these until the edges are a little "dry" and top is not as shiny (these are hard to burn).  This will help to have a non-doughy and easy-flipping pancake.
I also doubled the recipe for the purpose of freezing.  Worked great.  I usually reheat in the microwave for about 30-40 seconds and then pop them in the toaster to keep the soggy away.

Rating:  5 stars
-these are delicious and my 1 year old twins love these also.

Wednesday, February 15, 2012

Whip It Up Wednesday -- Mama Chang's Spicy Chicken

I have decided to add on to scheduled posts on this blog by including Whip It Up Wednesdays.  I will be sharing some of my favorite recipes as well as recipes that I discover and try out online.  I will rate and review them and discuss tips or changes I made or would make.

* original recipe found here (I changed the name a little based on how I've made this)

Mama Chang's Stir-Fried Shrimp and Scallions
*not my picture...I forgot to take one; will replace this if I remember next time*
Ingredients:


1 1/2 to 2 lb chicken
3 garlic cloves
1" piece of fresh ginger
1 1/2 tsp crushed red pepper 
1 large egg white
2 tsp cornstarch
3/4 C ketchup
1/2 C low sodium chicken broth
1 Tbsp Sugar
1 1/2 tsp ground pepper
1 1/2 tsp salt
1/4 C canola oil
3 scallions/green onions
1/2 C coarsely chopped cilantro (optional;  I don't use this)


1.  Cut up your chicken into bite size pieces and cook in a large skillet.  When they are mostly done remove from heat and place into a large mixing bowl.  


2.  Toss the chicken with garlic, ginger, red pepper, egg white and 1 tsp of cornstarch until well coated. 


3.  In a separate bowl, whisk the ketchup with the brother, sugar, pepper, salt and remaining 1 tsp of cornstarch. 


4.  Heat oil in your large skillet until shimmering.  Add your chicken mixture to the oil over med-high heat and let sizzle and cook until the chicken is somewhat golden.  Add the ketchup mixture and simmer for an additional 2 minutes or until the sauce has thickened.  Stir in the scallions and cilantro (or top with cilantro for garnish) and serve.  


* this can be served on it's own or pair with steamed rice or ham fried rice.  


Ratings/Comments:  I really love this recipe.  It is a little spicy so if you are sensitive to spice considering cutting down or cutting out the ginger and/or red pepper.  The original recipe is made with shrimp.  Since I made it with chicken I  made sure to cook my chicken thoroughly before mixing with other ingredients.  Then I cooked the chicken in the oil til golden to make it a little crispy.  Original recipe also recommends slicing the garlic and mincing the ginger.  I used a garlic press on the garlic and grated the ginger with a small cheese grater. 

Sunday, October 23, 2011

Homemade Oreos

-I stole this recipe from a good friend of mine.  Best ones I have ever tried and amazingly easy too.
Homemade Oreos

Ingredients:
1 box Devils Food cake mix
1 stick of butter
1 egg
1 tub of Vanilla icing

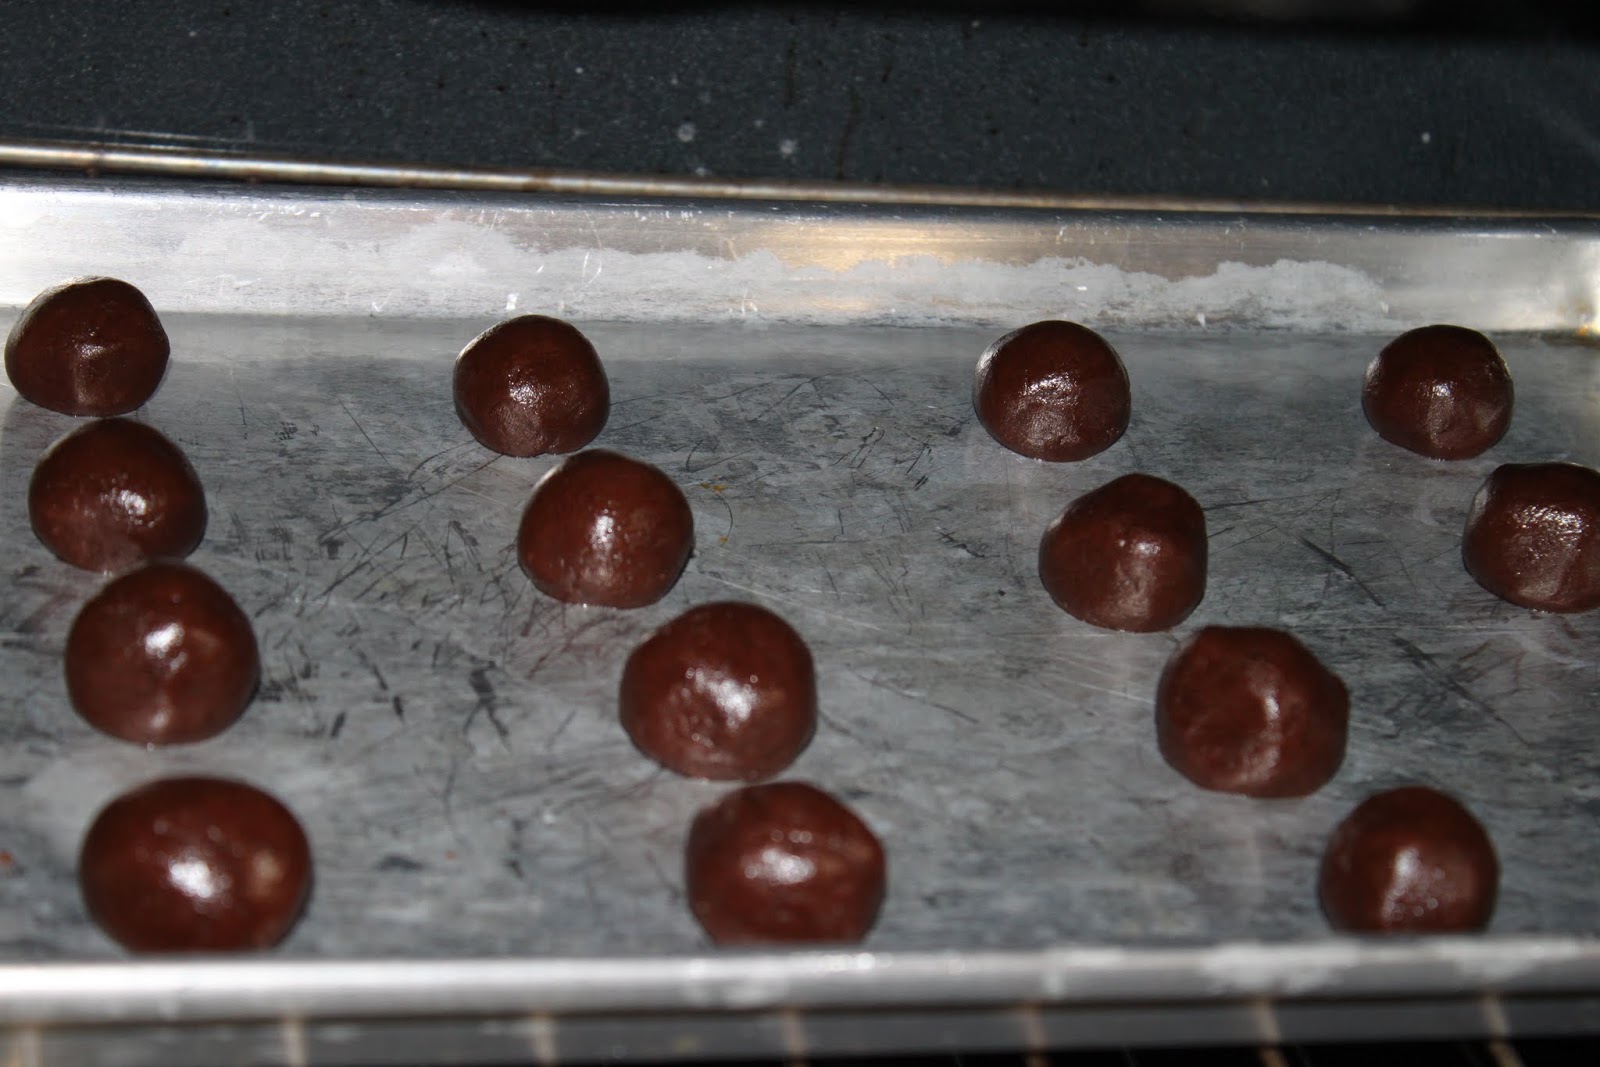
Mix the cake mix, butter (melted) and egg together.  This will form a slightly crumble type batter.  Form small balls (approx 1 1/2" diameter) and place on a cookie sheet in even numbers.  Bake at 350* F for 8-10 minutes.  Allow to completely cool.  Pair up cookies and place icing in between each pair.

 the mix is kind of dry but mashes together to form balls
 I usually fit a dozen cookies or more on a cookie sheet...they don't spread to much with baking

Sunday, October 9, 2011

Halloween Party

We had our Halloween party early this year.  We have what we call "Gatsby Night" among our close friends.  We get together once a month to have dinner (trading off houses) and hang out.  We were in charge of October so I bought some festive decoration at our dollar store (spider web, LED tea candles, a skeleton, some "caution" tape and toxic shot glasses).  Then it was off to the second-hand thrift store for a couple of interesting glass pitchers.  For the menu I considered small pumpkins with soup inside but the price of pumpkins was too high for my taste so I saw this stuffed pepper jack-o-lantern idea online and went with it.  It was a lot of fun preparing for that night and now we're all ready for Halloween too.  Yeah!  I wish I would have taken pictures but alas these "stock" photos will have to do.
Great Idea! We will be doing this for October in the future
We had "blood" to drink in wine glasses (orange juice with red food coloring and touch of blue Koolaid for color);  also had green Koolaid in the "toxic" shot glasses.

**Recipe for Stuffed Peppers found here (super delicious).  

Wednesday, July 6, 2011

Berry Lime Sublime smoothie

I think that is what it was called back in the day when I went to Jamba Juice a lot.  It has since been retired from their menu (I believe) and I was forced to graduate to my second favorite the Caribbean Passion.  These are estimates on what I add.  And of course my version as well.

Berry Lime Sublime

1/2 cup mixed berry (raspberry, blackberry and blueberry) - Sam's Club
2 oz frozen peaches (I cheat and use baby food puree that's frozen...since they don't like peaches still)
1 scoop lime sherbet
1 cup apple juice (enough to cover the other ingredients)

I use a small power blender (like the magic bullet) and put my frozen berries and peaches in first, then my sherbet and then top it all with apple juice.  Usually I just fill in with apple juice until it covers the frozen ingredients.  Sometimes I have to add more juice to get the right consistency.  Then just power blend until all the frozen stuff is broken down and enjoy.

Wednesday, April 20, 2011

French Onion Soup

So French Onion Soup is my absolute favorite.  I used to order it at every restaurant that offered it and constantly craved it.  Marie Calendars and Mimi's Cafe were my favorite's by the way...in case you were wondering.  Anyway my sister shared a recipe with me for it and I went off of this and altered it to my liking and adding things for taste or similarity to my favorite places.

French Onion Soup

2 Tbsp butter
1 can beef broth
1/2 to 1 beef bullion cube (I like a stronger taste)
1 medium onion
1 slice of French bread or other thick bread slightly dried
1 slice of mozzarella or swiss cheese
splash of red wine vinegar (optional) **
1 Tbsp diced green onions (optional) **

**some measurements are estimates...it's an art really


Melt butter in a small boiler.  Slice onion and add to the butter.  Saute onions until the are golden brown and tender.  Add the beef broth and bring to boil.  Add bullion if desired.  Let simmer for a few minutes to melt the bullion.  Bring to a boil and add the green onions and vinegar.  Ladel the contents into a soup crock or other oven safe bowl (I like this style of crock as it fits more soup...however I like the look of the one in the picture so I used it for this).  Place the bread on top of the soup...in my experience it works better if there is enough onion in the bowl that it sits on the onion and doesn't float (ie get soggy) in the broth.  Place slice of cheese on the bread and sprinkle with parmesan cheese.  Place the dish into the oven and broil for a few minutes until the cheese bubbles and browns a little.  Remove from oven and allow to cool slightly before serving. Yields a little over a crock full.